
Understanding the Role of a Tile Installater Salem
What Does a Tile Installater Do?
A Tile Installater Salem plays a critical role in the process of transforming spaces through the installation of tiles in various environments, such as homes, office buildings, and commercial spaces. Their responsibilities encompass not only the physical placement of tiles but also the careful planning, surface preparation, and adherence to design specifications. This professional ensures the installation adheres to safety and industry standards, providing aesthetically pleasing and durable finishes.
Types of Tile Installations
Tile installations can vary widely based on the type of tile and the intended setting. Here are some common types:
- Ceramic Tile Installation: Popular for its versatility, this type is often used in kitchens and bathrooms.
- PORCELAIN TILE INSTALLATION: Known for its durability, making it suitable for high-traffic areas.
- NATURAL STONE INSTALLATION: Includes granite, marble, or slate, offering a unique look for luxurious spaces.
- GLASS TILE INSTALLATION: commonly used for backsplashes, providing a modern touch.
- VINYL TILE INSTALLATION: A budget-friendly option for anyone looking to upgrade their flooring.
Benefits of Hiring a Professional Tile Installater Salem
There are numerous benefits to hiring a professional tile installater:
- Expertise and Experience: Professionals are trained in the best practices for tile installation, ensuring quality outcomes.
- Time Efficiency: Experienced installers can complete the job faster without sacrificing quality.
- Proper Tools and Equipment: Professionals have access to the right tools that may not be available to the average homeowner.
- Problem-Solving Skills: They can navigate potential challenges that may arise during the installation process.
- Warranty and Assurance: Many professionals offer warranties on their work, providing peace of mind for the homeowner.
Choosing the Right Tile for Your Project
Tile Materials: A Comparative Guide
Understanding the different types of tile materials available is crucial for making an informed choice:
| Type | Durability | Cost | Maintenance |
|---|---|---|---|
| Ceramic | Medium | Low to Medium | Easy |
| Porcelain | High | Medium to High | Easy |
| Natural Stone | High | High | Medium to High |
| Glass | Medium | Medium to High | Easy |
| Vinyl | Low to Medium | Low | Very Easy |
Design Considerations for Your Space
When choosing tiles, consider the design style you want. Here are some tips:
- Color Scheme: Choose colors that complement your existing decor.
- Size and Layout: Large tiles can make a space feel bigger, while smaller tiles can create intricate patterns.
- Texture: Matte finishes have a more rustic look, while glossy finishes can brighten the area.
- Functionality: Consider the room’s use; slip-resistant tiles are crucial for bathrooms and kitchens.
Cost Considerations in Tile Selection
The cost of tiles can vary widely based on factors such as material, size, and brand. Setting a budget before you begin shopping can help narrow your choices. Additionally, consider other costs associated with the installation, such as labor, adhesive, grout, and any necessary substrate preparations.
Preparing for Tile Installation: Essential Steps
Assessing the Space and Making Measurements
Before installation, accurate measurements are vital. Measure the length and width of the area where tiles will be installed. This ensures you purchase the correct amount of tile while also accounting for waste, trimming, or mistakes. A basic rule is to add around 10% more tiles to your calculated amount.
Understanding Substrate Preparation
The substrate is the surface beneath the tile, and its condition impacts the longevity of your tile installation. Here are common steps for preparation:
- Ensure the surface is clean, dry, and level. Any imperfections will affect the tile adhesion.
- For concrete floors, check for cracks and repair them before installation.
- If installing over wood floors, ensure the wood is solid and without movement.
- Use a cement backer board for areas anticipated to get wet, like bathrooms, to prevent moisture-related issues.
Gathering Necessary Tools and Materials
Before starting the installation, gather the following essential tools:
- Tile Cutter or Wet Saw
- Notched Trowel
- Grout Float
- Level
- Measuring Tape
- Rubber Mallet
- Spacers
- Bucket and Sponge for cleaning
Installation Process by a Tile Installater Salem
Step-by-Step Installation Guidelines
The installation process generally follows these steps:
- Mark the Layout: Use chalk lines to mark where the first tile will go.
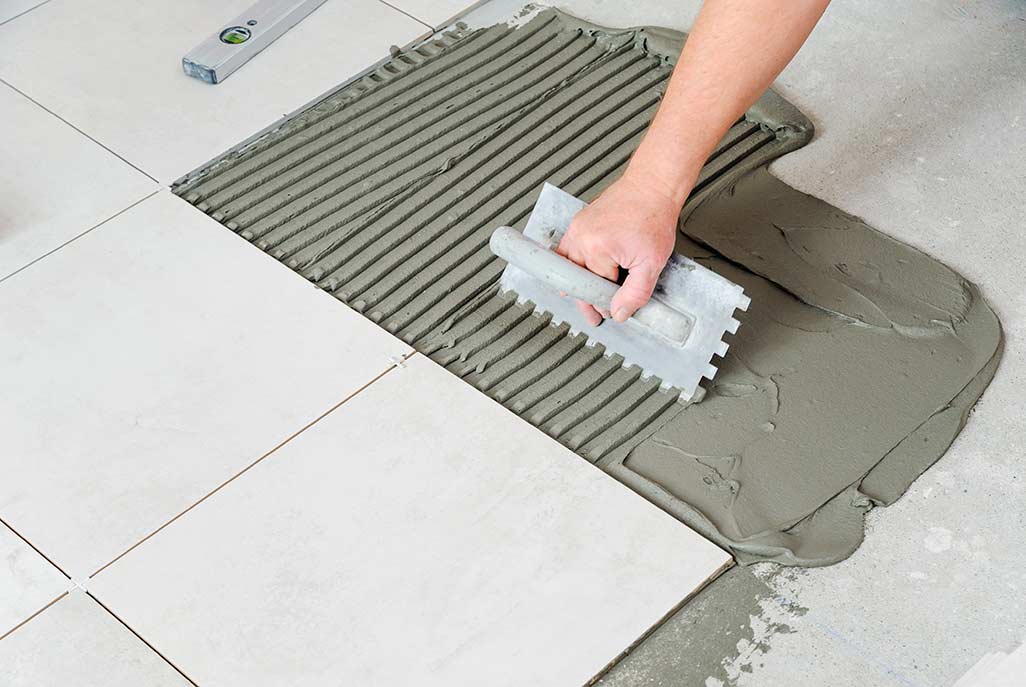
- Apply Adhesive: Use the notched trowel to spread adhesive on the substrate.
- Set the Tiles: Press each tile firmly into the adhesive, ensuring even spacing with spacers.
- Cut Tiles as Needed: Use a tile cutter to trim the tiles to fit corners or edges.
- Let the Adhesive Cure: Allow the adhesive to dry as per the manufacturer’s instructions before grouting.
Common Challenges During Installation
Tile installation is often fraught with challenges, including:
- Uneven Floors: To deal with this, apply a self-leveling compound before installing tiles.
- Incorrect Measurements: Double-check measurements before cutting to prevent waste.
- Adhesive Seepage: Clean any excess adhesive off the surface immediately.
- Tile Breakage: Handle tiles with care and make cuts carefully.
Final Touches: Grouting and Sealing
Once the tiles are installed and the adhesive has cured, it’s time to grout:
- Mix the Grout: Prepare according to the manufacturer’s instructions.
- Applying Grout: Use a grout float to apply the grout into the joints between the tiles.
- Wipe Excess Grout: Use a damp sponge to clean the surface and remove excess grout.
- Seal the Grout: After the grout has cured, apply a sealer to prevent staining and moisture absorption.
Maintenance and Care for Your Tile Installations
Cleaning Techniques for Different Tile Materials
Maintaining tile installations involves regular cleaning, which varies by the type of tile:
- Ceramic and Porcelain: Wipe with a damp mop and mild detergent.
- Natural Stone: Use pH-neutral cleaners to avoid damaging the surface.
- Glass Tiles: Clean using a glass cleaner for a streak-free shine.
- Vinyl: Vacuum regularly and use a damp mop for cleaning.
Preventive Measures to Protect Your Investment
To ensure your tiles last, consider these preventive measures:
- Use area rugs in high-traffic zones to reduce wear and tear on tiles.
- Regularly inspect grout lines for cracks and reseal them to avoid moisture issues.
- Promptly clean spills to prevent stains, particularly on porous surfaces.
When to Call a Professional for Repairs
Despite all preventive measures, issues may arise that require professional intervention. Common situations include:
- Visible cracks in tiles indicating potential structural damage.
- Water damage around grout lines or persistent moisture issues.
- Significant discoloration that basic cleaning cannot resolve.
Frequently Asked Questions
1. How long does tile installation typically take?
The time required for tile installation varies based on the space size and tile type, but most projects can range from a few hours to several days.
2. What should I do if a tile gets damaged?
If a tile is damaged, it should be replaced as soon as possible to prevent water damage and maintain aesthetics. Hiring a professional for this repair is advised.
3. Are there eco-friendly tile options available?
Yes, there are eco-friendly tiles made of recycled materials or sustainably sourced products, such as bamboo or cork tiles.
4. How do I choose a tile color and style?
Consider your overall design theme, space size, and lighting when selecting tile colors and styles. Neutral shades can offer flexibility, while bold tiles can accentuate features.
5. Can I install tiles myself?
While DIY tile installation is possible, hiring a professional is recommended for the best results, especially for complex projects or large areas.